Effortless Hot Tub Cleaning: Quick Tips for a Sparkling Soak
October 01th, 2024
October 01th, 2024
Owning a hot tub feels like a blissful retreat right in your backyard—until it's time to clean it. This task, often dreaded, doesn’t have to consume an entire weekend. With the right approach, you can restore your bubbling oasis to its pristine state in less than a day.
When I first tackled my own hot tub, I was overwhelmed by the mountain of advice available. Conflicting methods made the process seem more complicated than it needed to be. Over time, through trial and error, I discovered a streamlined routine that not only ensures a sparkling clean tub but also leaves enough time to actually enjoy it.
First, gather your supplies. A thorough cleaning kit includes a soft brush, a non-abrasive cleaner, test strips, and a garden hose. Having everything within arm's reach keeps the process efficient and smooth. Next, drain the water. This is where most people falter, spending ages watching the water slowly trickle away. Instead, use a submersible pump for a quick drain. While the water levels drop, you can focus on other tasks like removing and soaking the filters.
The video accompanying this guide will walk you through each step, offering visual cues and tips to enhance your cleaning strategy. By the end of the day, with minimal effort and maximum results, your hot tub will be ready for a well-deserved soak.

Unclogging the hidden paths of your hot tub's plumbing might not be as glamorous as soaking under the stars, but it’s crucial for pristine, bubbly bliss. Consider the inside of a hot tub like the arteries of a living organism. Over time, a cocktail of lotions, sunscreens, and body oils slowly forms a stubborn biofilm, clogging the veins and reducing performance. Ignoring this gunk means your usual chemical treatments will struggle to keep the water clean, allowing bacteria to thrive in the depths of your spa’s system.
So, how does one tackle this murky buildup? Begin by selecting a reliable line flush cleaner crafted specifically for hot tubs. This isn't just any cleaning agent; it's designed to dismantle the biofilm that’s been lounging inside your pipes for months. Pour it into your filled hot tub, power up the jets, and let the magic happen. The cleaner will scrub through the plumbing, dislodging grime and sending it to the surface. Don’t be startled by the unsightly foam that appears—it's a testament to the cleaner’s effectiveness, purging what’s been lurking out of sight.
Once the pipes have been purged, it’s time to drain the tub completely. While the water empties, clean the filters and wipe down the shell. Soon, you’ll refill with fresh water, and your hot tub will be ready to deliver a spotless soak. A little elbow grease ensures your next dip is as refreshing as the first.
The inner workings of a hot tub might be out of sight, but they're not out of mind for anyone who values a pristine soak. Tucked within those pipes is a stubborn buildup known as biofilm—a sneaky concoction of grime, oils, and products that resist regular chemical treatments. Imagine a party guest who overstays their welcome, making themselves comfortable in your space. That's biofilm, and it needs more than a polite hint to leave.
To kick-start the eviction, a hot tub line flush is indispensable. Before draining, remove your cartridge filters, then introduce a line flush cleaner into the water. This solution acts like a super-sleuth, breaking down the biofilm's defenses. It's crucial to run the jets on high for at least 20 minutes, ensuring every nook and cranny is reached. Keep the cover off—this isn't the time for clandestine operations. If the grime in your pipes resembles a relic, consider extending the flush overnight for a thorough cleanse.
As the cleaner circulates, you might notice unsightly foam or scum on the water’s surface. Don't worry, it's just evidence of the battle being won. If the foam threatens to breach the tub's edge, a skimmer net can come to the rescue. Once the revolt subsides, turn off the jets, cut the power, and proceed to drain the tub. While the water disappears, take a moment to cleanse the filter with a powerful spray or an overnight soak in a cleaning solution. By addressing the biofilm head-on, the path to a spotless hot tub is clear, setting the stage for a refreshing soak.
Efficient hot tub maintenance involves more than just wiping down surfaces; it requires a strategic approach to refilling and balancing. After the draining and cleaning marathon, the refilling process is an opportunity to start fresh and maintain crystal-clear waters.
Begin by ensuring every jet is open. This simple step can prevent pesky airlocks that disrupt water flow. Grab a hose with a filtration unit attached—this helps remove unwanted minerals and metals from tap water, ensuring a pristine refill. It’s tempting to rush, but patience pays off. Insert the hose directly into the filter housing. This directs the water through the internal plumbing first, minimizing the chances of air getting trapped.
Once your hot tub is filled to the appropriate level, it's time for chemistry. Don’t let the word intimidate you. Think of it as cooking for your hot tub. Start with alkalinity, ensuring it’s within 100-150 PPM. This sets the stage for pH levels, which should sit between 7.4 and 7.6. With these balanced, introduce your sanitizer—chlorine or bromine works wonders here. Allow these to circulate for a good 20 minutes.
Consider it a ritual. With jets on low and the cover secured, the water warms and the chemicals dissolve, setting the scene for a perfect soak. Whether it’s a spontaneous dip or a peaceful evening under the stars, a well-maintained hot tub always delivers.
Water chemistry often feels like the unsung hero in hot tub maintenance. Often overlooked, the delicate balance of chemicals keeps your soak more of a blissful retreat than a murky misadventure. Whenever I tackle my own hot tub, I find that taking the time to balance the water chemistry is akin to a gentle art form - one that rewards with crystal-clear waters and a soothing experience every time.
Before you even think of stepping in, start by testing the water's pH and alkalinity. These two components are your baseline, akin to tuning an instrument before a concert. Alkalinity should hover between 100 to 150 parts per million (ppm) while pH needs to rest between 7.4 and 7.6. Too much deviation, and you’re looking at water that’s either corrosively acidic or a breeding ground for scale and cloudiness.
With the groundwork laid, the next step is introducing a sanitizer. Usually, this means adding chlorine or bromine, which does the heavy lifting of keeping bacteria at bay. Unlike the usual maintenance days, today you won't need to shock the water since it's fresh. Allow these new additions to circulate for a good 20 minutes, ensuring they mix thoroughly without causing any unwelcome chemical reactions.
Finally, it’s the waiting game. Let the water settle and the sanitizer work its magic over the next 8 to 12 hours. Consider this the downtime where all your diligent work comes together. With the warmth gently cradling the dissolving chemicals, you'll soon have a hot tub that welcomes you back with open arms, ready to offer another round of relaxation.
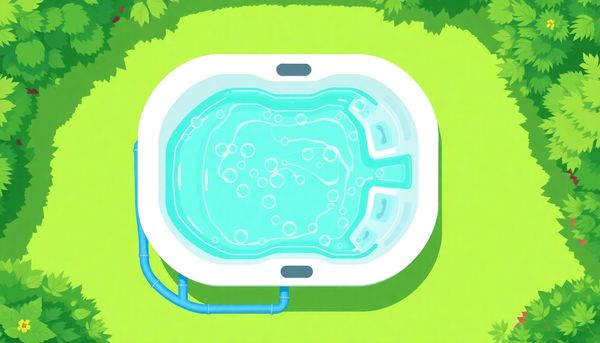
A hot tub can be a sanctuary of relaxation, but only if it's kept fresh. Over time, the water becomes a playground for contaminants like lotions, hair products, and body oils. These substances sneak past the best of filters, building a stubborn biofilm inside the plumbing. Regular draining and refreshing every three to four months is essential to combat this invisible enemy. It’s like hitting the reset button on your spa experience, ensuring that each soak is as delightful as the first.
Start by preparing to purge the pipes. This step involves using a line flush cleaner, which might sound intimidating but is actually straightforward. Simply pour the cleaner into the water and let the jets circulate it for about 20 minutes. You might see some frothy foam appear, a clear sign that the biofilm is being evicted. While it might not be the prettiest sight, it's an indication that the cleaner is doing its job.
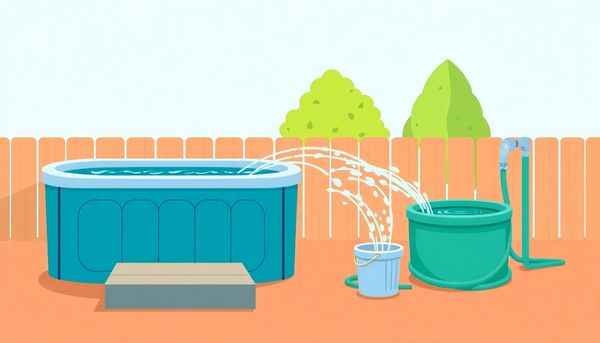
After the flush, it's time to drain the water. Use a hose or, for a quicker option, a submersible pump. As the water leaves, take the opportunity to clean the shell and filters. A gentle scrub with a diluted vinegar solution works wonders on the walls of the tub. For the filters, a soak in a cleaning solution can restore them to peak performance. Refreshing the water is the final flourish. Refill the tub with clean, filtered water, and balance the chemicals to welcome the next round of relaxation.
Revitalizing your hot tub experience starts with tackling the hidden culprits lurking within its pipes. Over time, unnoticed by most spa owners, an insidious layer of biofilm forms inside the hot tub plumbing. This biofilm, a stubborn mix of lotions, oils, and minerals, becomes resistant to regular chemical treatments, turning what should be a relaxing soak into a potential health hazard. To maintain optimal performance and keep your spa water pristine, purging these pipes periodically is essential.
My friend Sarah, a seasoned hot tub enthusiast, once shared her initial neglect in maintaining her tub's plumbing. She noticed her water wasn't as clear as it used to be, and after some research, discovered the importance of using a line flush cleaner. Adding this special cleaner to her maintenance routine transformed her spa experience; the water sparkled, and the persistent musty smell vanished.
Begin your purging process by removing the filters and adding a line flush product to the water. Activate the jets, allowing the cleaner to circulate thoroughly. As it works its magic, you might witness unsightly foam or scum—proof it's breaking down the biofilm. If the foam threatens to spill over, simply lower the jets or scoop it out. After this, power down the spa and drain it completely. This thorough cleanse ensures your hot tub runs smoothly, ready to deliver a clean, invigorating soak every time.
In the world of hot tub maintenance, there's a sneaky villain called biofilm. It's a stubborn layer of gunk that loves to lurk in the hidden parts of your spa. This sticky film thrives on lotions, oils, and other residues that evade normal cleaning routines. If you’ve ever found yourself battling murky water or a funky smell, biofilm might just be the culprit.
To tackle this slippery foe, a line flush is your secret weapon. This process might sound complex, but it's simple and incredibly effective. First, remove the cartridge filters—these are the guardians of your water’s purity. Next, introduce a line flush cleaner into the existing water, letting it mingle with your hot tub's inner workings. As your jets start to hum, the magic begins. The line flush circulates through the pipes, shaking loose the biofilm and any other hidden grime.
Keeping the cover off, let the line flush work its wonders for at least 20 minutes. However, for hot tubs that have been a bit neglected, extend this time to ensure a thorough cleanse. You’ll notice unsightly foam or scum surfacing, a sign that the flush is doing its job. Don't worry—this is a good thing! If the foam gets out of hand, pause the jets to allow it to settle before resuming.
Once the flush has done its part, turning off the jets marks the conclusion of this deep-cleaning ritual. What follows is draining and scrubbing the hot tub shell, but that’s a tale for another time. For now, rest easy knowing that your hot tub’s pipes are free of biofilm, setting the stage for a refreshing soak.
Revitalizing the shell of your hot tub is like giving it a fresh lease on life. Over time, the glossy acrylic exterior can lose its shine, marred by the elements, oils, and debris. To restore its original luster, all it takes is the right approach and some elbow grease. One sunny afternoon, I tackled this task with the enthusiasm of a DIY warrior. First, gather your tools: a soft cloth, a bucket of warm water, and a gentle cleaner like diluted white vinegar. Avoid harsh chemicals that might damage the surface or alter the water chemistry later on.
Begin by ensuring your hot tub is completely drained, offering a blank canvas to work on. With a soft cloth dipped in the vinegar solution, gently wipe down the entire shell, paying special attention to any stubborn spots or stains. For those particularly pesky marks, a bit of baking soda can provide a mild abrasive boost without scratching the surface. My trusty sponge worked wonders on those grimy nooks.
As you scrub, let the rhythmic motions bring a sense of satisfaction; it’s as though each wipe uncovers a forgotten gleam. Once you've covered every inch, rinse thoroughly with clean water. This step is vital to prevent any cleaning residue from clouding your next spa session. As the sun set on my freshly polished hot tub, I admired its renewed brilliance, eagerly anticipating the next relaxing soak.
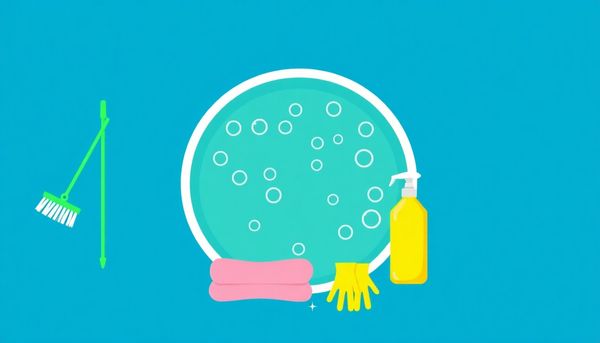
Achieving a pristine hot tub surface requires more than a cursory wipe-down, especially when it's time for that deep clean. Before you begin, gather your cleaning supplies: a soft cloth, a non-abrasive sponge, and either diluted white vinegar or a gentle hot tub cleaner. It's essential to avoid harsh chemicals that could damage the acrylic shell or unbalance your water chemistry. A friend once used a scrubbing brush and ended up with tiny scratches that caught dirt—a lesson in gentleness!
First, ensure the entire tub is free of water. Once drained, focus on those hard-to-reach spots—the nooks around the jets and the crannies beneath the headrests. These areas often harbor hidden grime. A quick tip: a toothbrush can be your best ally for this task, providing precision without the risk of scratching.
When dealing with tough spots, white vinegar can be surprisingly effective. Its natural acidity helps dissolve stubborn mineral deposits without leaving a soapy residue. Simply spray it on the surface, let it sit for a few minutes, and then wipe away with your soft cloth. For extra shine, a hot tub shell polish can add a protective layer, but it’s usually not necessary if regular maintenance is performed.
Don't forget the hot tub cover. A diluted vinegar solution works wonders here too, especially for removing mildew. This step completes the deep clean, ensuring your hot tub is as inviting as the day you first installed it—a testament to the care and attention it deserves.
Efficiently tackling the task of purging your hot tub plumbing system is crucial for maintaining a clean and enjoyable spa experience. A few months back, I noticed my hot tub was less inviting, with water turning cloudy and an unpleasant odor lingering in the air. That's when I learned the importance of purging. Biofilm, a stubborn layer of gunk, builds up in the plumbing over time, resistant to regular cleaning methods.
To start, remove your cartridge filters and add a reliable line flush product directly to the water. Choose a brand that targets biofilm specifically, as it will break down this tough layer. Turn your jets on full blast and let the magic happen. The line flush will circulate through the system, aiming to dislodge all that built-up grime. While the jets work, keep an eye on the water. A foam or scum layer may appear, evidence that the flush is effectively pulling out all the unwanted debris.
If excessive foam forms, turn off the air valves to let it settle or use a skimmer to remove it. Let the flush run for at least 20 minutes, but if the tub has been neglected for a while, consider letting it circulate overnight. Once done, switch off the jets and cut the power at the circuit breaker. Now, you’re ready to drain the tub completely, using either a hose or a submersible pump.
Remember, a quarterly purge ensures your hot tub stays inviting and free of hidden nasties. It’s a simple step that promises a clearer, fresher soak every time.
Biofilm buildup inside your hot tub’s plumbing can be a stubborn adversary, lurking out of sight and slowly causing issues over time. These slime-like layers are more than just an eyesore—they can resist typical sanitizers, requiring a more strategic approach to eradicate them. For a friend of mine, a neglected hot tub led to such a stubborn biofilm that it transformed what used to be their relaxing oasis into a scummy mess. This is where a line flush cleaner becomes your best ally.
A line flush cleaner is specifically designed to tackle the biofilm head-on. Begin by removing your cartridge filters and adding the recommended amount of line flush cleaner to your hot tub water. As the jets circulate the solution, they’ll work tirelessly to dislodge and dissolve all that pesky buildup. You’ll soon notice foam or scum rising to the surface—proof that the cleaner is doing its job. It’s reminiscent of a pot boiling over with unwanted remnants, and while it’s not the prettiest sight, it’s a necessary step to ensure your hot tub’s longevity.
Remember, once the line flush has done its work, it’s crucial to drain all the water and give your system a fresh start. This not only ensures that no remnants of the biofilm remain but also prepares your tub for a pristine refill. Regular use of a line flush cleaner every few months will keep your hot tub running smoothly and maintain that crystal-clear water you love.
Hot tub bliss is only possible with pristine water, maintained with a delicate chemical balance. This is where the magic of water chemistry comes into play, transforming your tub into a crystal-clear oasis. Remember that one time you skipped chemistry class? Don't worry; this lesson is much more rewarding. Start by checking the pH levels, aiming for a sweet spot between 7.4 and 7.6. Anything too high or low can lead to irritation or damage to the tub's materials.
Alkalinity acts as your water's buffer, preventing sudden pH changes. Strive to keep it between 100 to 150 PPM; it's like having a safety net for your pH levels. Once your alkalinity is stable, the pH is easier to manage, ensuring the water remains gentle on your skin. Next, sanitize the water using chlorine or bromine. These trusty agents combat bacteria and help maintain that fresh, inviting look.
Don’t forget about calcium hardness—keep it around 150 to 250 PPM to shield your tub from scaling and corrosion. If this feels like a lot to track, test strips or kits simplify the process, offering quick results. A friend once joked that perfect hot tub chemistry is like baking the perfect cake, minus the delicious smell. However, achieving this balance is a ticket to a rejuvenating soak every single time. Regular testing and minor adjustments keep your hot tub water clear and inviting, making every dip a delight.
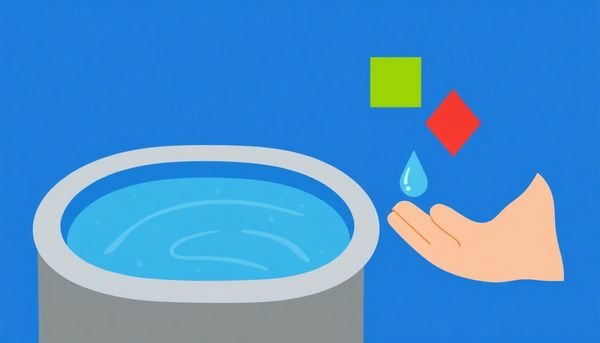
Maintaining the perfect balance in your hot tub's water chemistry can feel like a chore, but it’s the secret to keeping the water crystal clear and inviting. Think of it as your spa’s wellness check-up. Slight imbalances can lead to unpleasant effects, like cloudy water or skin irritation, turning your relaxing soak into a less-than-pleasant experience. A friend once shared how his hot tub became a chemical soup because he neglected the basics, and the fix was both costly and time-consuming.
Begin with testing the water using reliable test strips, focusing on total alkalinity and pH levels. Alkalinity acts as the buffer, preventing drastic pH fluctuations. Ideally, you want the alkalinity to hover between 100 and 150 PPM. Next, adjust the pH, aiming for a sweet spot between 7.4 and 7.6. Most hot tub owners, myself included, have learned that these numbers aren’t just textbook recommendations but the key to a smooth-running spa.
After balancing the pH and alkalinity, it’s time to add sanitizers like chlorine or bromine. These agents work hard to keep bacteria and algae at bay. Remember, fresh water doesn’t require shock treatment immediately, so save it for the weekly maintenance routine. Allow the water to circulate for 8-12 hours, letting the chemicals mix thoroughly. Using the cover during this process helps retain warmth, aiding in the dissolution of the chemicals. By keeping a close eye on these elements, your hot tub remains a haven of relaxation, free from unwanted surprises.
Every hot tub owner knows that, just like any well-loved treasure, maintenance is key to keeping the experience delightful. Over time, the hidden network of pipes beneath your hot tub's glossy surface becomes home to a host of unwanted guests—biofilm made up of oils, lotions, and residue. This gunk doesn’t just sit idly by; it quietly resists your regular chemical treatments, waiting for a chance to spoil your next soak with murky water or unpleasant odors.
To tackle this sneaky build-up, enter the hot tub line flush, your secret weapon in ensuring a pristine tub experience. Start by removing your cartridge filters to allow the flush direct access to those hidden nooks and crannies. Add a line flush cleaner to your water, and let the magic begin. With the jets on high, the cleaner circulates through the pipes, breaking down layers of biofilm and grime that are invisible to the eye but potent enough to cause trouble.
As the process unfolds, you might notice unsightly foam or scum appearing on the water’s surface. That’s your cue that the line flush is doing its job. If it becomes excessive, simply pause the jets to let the foam settle or scoop it out gently with a skimmer net. Once clear, restart the jets and continue the purge for at least 20 minutes, or extend the duration if your tub has been feeling neglected.
Upon completion, shut off the jets, drain the water, and prepare to be amazed at how refreshed your hot tub feels. With a clean slate set for fun and relaxation, you'll be reminded why regular maintenance is worth every minute spent.
You've reached the final stretch of hot tub maintenance, and it's time to give your beloved spa a fresh start. Refilling the tub with clean water transforms not only the look but also the feel of your hot tub experience. After the deep clean, fill your tub with a hose filter, ensuring any unwanted minerals or metals are left at the curb. This simple step helps maintain the pristine chemistry of your water and supports a smooth soak without surprises.
Ensuring the water flows properly is crucial, so begin by placing the hose inside the filter compartment. This technique allows water to fill the plumbing first, potentially averting issues like air locks, which can disrupt your peaceful soak. Face any air lock problems with confidence by checking out handy guides for troubleshooting.
As the tub fills, take a moment to care for the cover and surrounding cabinet. A diluted vinegar solution works wonders on the underside, while a gentle wood cleaner will have the exterior looking its best. These details might seem small, but they add up to a spa experience that feels brand new every time.
Once full, it's time to test and balance the water. Check alkalinity and pH levels, aim for that sweet spot where everything just clicks. Let the water circulate for a bit, then add your sanitizing agent of choice, be it chlorine or bromine, to keep everything sparkling. Within a short time, your hot tub will be ready to welcome you back, offering a clean, inviting retreat.
Balancing the alkalinity and pH of your hot tub is akin to finding the perfect recipe for your favorite dish—one misstep can throw the whole experience off balance. Imagine you’re having a gathering and the hot tub is the centerpiece of the evening. You want it to be just right, like the perfect temperature of your favorite soup. Alkalinity acts as a stabilizer for your pH levels, ensuring that they don't fluctuate wildly, which could lead to skin irritation or equipment damage.
After the initial fill, use a reliable test strip or kit to gauge your water's current state. It's not just about numbers; it's about creating a harmonious environment. Aim for an alkalinity level between 100 and 150 parts per million (ppm). This ensures your pH remains in the sweet spot of 7.4 to 7.6—neither too acidic nor too basic. If your alkalinity is low, consider adding an alkalinity increaser. Conversely, if it’s too high, a gentle nudge with pH decreaser will do the trick.
When I first tackled this task, I underestimated the importance of these levels. My hot tub turned into a chemistry experiment gone wrong, complete with cloudy water and itchy skin. Learn from my mistakes: take the time to get it right. Once you’ve achieved balance, let the chemicals circulate for about 20 minutes before introducing sanitizers like chlorine or bromine. With everything in harmony, your hot tub will be a welcoming retreat, not a chemistry conundrum.
Filters, the unsung heroes of your hot tub, play a pivotal role in maintaining a pristine soak. Much like the lungs of your tub, they capture debris, oils, and other impurities before they circulate through the water. A neglected filter can not only cloud your water but also strain your spa’s hardworking pump.
A good friend once compared hot tub maintenance to tending a garden: the more care you put in, the more you get out. A key part of this care involves regular filter maintenance. Once a week, remove the filter and give it a thorough rinse under high pressure using a garden hose. This simple act prevents buildup, ensuring water flows freely and stays clean.
Every month, take it a step further by soaking the filter in a special solution designed to dissolve oils and dirt clinging to the filter's pleats. Let it sit overnight for best results—a practice as satisfying as watching your favorite overnight marinade work its magic in the kitchen. If your filter starts showing signs of wear or is over a year old, it's time to invest in a new one. A spare filter on hand allows you to swap them out without any downtime, keeping your tub ready for a dip at all times.
By incorporating these easy habits, you ensure your hot tub's performance remains top-notch, allowing for endless hours of relaxation without the worry of murky waters.
Nobody expects their hot tub to become a breeding ground for unwelcome guests, yet biofilm buildup in the plumbing can turn even the most pristine soak into a murky mire. Regular maintenance is your secret weapon, transforming your spa experience from bogged down to blissful.
Start with the basics: your hot tub's plumbing lines. These hidden arteries of relaxation can collect a surprising amount of gunk. From lotions to body oils, every soak contributes to the residue that clings to the walls of your pipes. To combat this, a line flush cleaner is essential. Pour it into the tub, turn the jets on high, and let it work its magic. A personal tip—don’t be alarmed by the unsightly foam surfacing; it’s proof of the cleaner pulling out the grime.
While the jets whirl, step back and consider the last time you gave this task its due diligence. If it’s been longer than expected, extend the flush duration to truly cleanse those pipes. The lingering residue not only affects water clarity but also undermines the effectiveness of your sanitizers.
Post-flush, keep the momentum going. Drain the water completely, ensuring every trace of the cleaner and dislodged biofilm exits with it. This step is crucial; otherwise, remnants can reattach, undoing your hard work. Clean, refill, and rebalance your chemicals, and soon enough, your hot tub will be ready to indulge you with crystal-clear waters and a soothing soak.
This article provided insights into maintaining your pool. Start your pool care journey today!
Want to become a pool maintenance expert? Our free Pool School course covers everything you need to know about pool care. From basic maintenance to advanced troubleshooting, you'll learn how to:
Join over 10,000 pool owners who have already transformed their pool care routine. Get started with our free Pool School course today!