Prevent Mildew on Hot Tub Pillows: Essential Cleaning Tips
July 18th, 2024
July 18th, 2024
The tranquil allure of a hot tub offers a serene escape from the hustle of daily life. Yet, lurking beneath the surface of this blissful retreat can be an unwelcome guest—mildew on the hot tub pillows. This persistent invader not only mars the aesthetic appeal but can become a health concern over time.
Hot tub pillows, designed for comfort and relaxation, often bear the brunt of moisture retention. They are the perfect breeding ground for mildew, especially when exposed to humid conditions and infrequent cleaning routines. My friend Sarah, an avid end-of-day soaker, once regaled me with her tale of horror: a once-pristine pillow turning into a speckled, musty-smelling nuisance in a matter of weeks. She learned the hard way that prevention and maintenance are key.
Addressing mildew isn't just about aesthetics; it's about ensuring longevity and hygiene. Ignoring the problem can lead to more than just an unpleasant smell; it can compromise the material of the pillows themselves. Whether you’ve noticed tiny black spots or a distinct musty odor, tackling this issue head-on is crucial.
As we explore the methods to banish mildew, keep in mind the satisfaction of reclaiming your hot tub oasis. Armed with the right knowledge and tools, you can turn the tide against mildew and restore your spa haven to its rightful state of relaxation and enjoyment.

A hot tub without its trusty pillows is like a book missing its final chapter—something vital is absent. But when mildew sneaks in, lounging loses its luster. Let’s tackle this head-on, transforming those pillows from moldy to magnificent.
First things first, gather the essentials. You’ll need a soft-bristle brush, a reliable cleaning solution, and some protective gear for yourself—gloves and goggles. The process starts by gently removing each pillow from its perch, taking care not to damage any attachments. Once free, those pillows are ready for their makeover.
Mix a cleaning solution with precision: 13 ounces of concentrate per gallon of water does the trick. Use your brush or sponge to scrub the pillows, paying special attention to every seam and crevice where mildew might hide. Consistency is key, so don’t rush this step. Think of it as a mini spa day for your spa accessories.
Once clean, a powerful disinfectant is your next ally. A mixture of bleach and water, with the right concentration, ensures that mildew gets the boot for good. Carefully wipe down every surface with the solution. Now, don’t just wipe them dry—let them bask in the sunshine for that extra mold-killing ultraviolet touch.
Before reuniting the pillows with the hot tub, ensure they're completely dry. A sniff test might save the day, ensuring no musty surprises remain. With your pillows restored, you can lean back, relax, and enjoy your soak with no worries in sight.
There's something oddly satisfying about restoring the comfort of your hot tub pillows. Tackling mold can seem daunting, but it's all about having the right approach. First, unfasten your pillows from the tub with care, ensuring you don’t damage any components. It's tempting to skip the manual, but a thorough read will prevent unnecessary headaches.
Next, gather your cleaning champions: a soft brush, a sponge, and a reputable cleaning solution. You might have a favorite brand for such tasks, or perhaps you're a DIY enthusiast who swears by a mix of vinegar and water. Whichever route you choose, remember the mixture must be both tough on mold and gentle on materials.
Begin by soaking your brush or sponge in the cleaning concoction, then gently but firmly scrub the pillow surfaces. Pay special attention to seams and corners—those sneaky spots where mold loves to hide. It may remind you of combing through a pet's fur to remove tangles; thoroughness is key.
Once you've scrubbed every inch, it’s time for a deeper cleanse. Create a disinfecting solution with bleach and water, adhering to safety with gloves and goggles. Wipe down each surface thoroughly, ensuring no crevice is overlooked. Leave the pillows out to dry completely, preferably under the sun's watchful eye.
As your pillows bask in the sunlight, rejoice in the restored freshness. The once-musty scent will be replaced by a readiness for relaxation. Taking the time to maintain your hot tub accessories ensures every soak is as serene as the last. Now, with pillows refreshed, you’re set for uninterrupted tranquility.
Once you've scrubbed every nook and cranny of those hot tub pillows, it's time to move on to the final, crucial step: disinfection. This isn't just about wiping away the visible invaders; it’s about ensuring they don’t make an unwanted comeback. Start by gearing up with safety goggles and gloves—protecting yourself is key. Don your long-sleeved attire as well, because the last thing you want is bleach splashing on bare skin.
Prepare a powerful disinfectant solution by mixing one-third cup of bleach per gallon of room-temperature water. Choose a bleach with a sodium hypochlorite concentration between 5% to 6%, as these concentrations are effective yet safe for most surfaces. Double-check the expiration date, as expired bleach loses potency and won't do the job.
Focus on every surface the mold might have touched: the shell, pillow covers, and foam encasements. Soak a clean cloth in the bleach solution and meticulously wipe down these areas. Remember, thoroughness now saves headaches later. After wiping, the crucial step is to let everything dry completely. A sunny spot outdoors is ideal, as sunlight further aids in destroying any lingering spores. But remember, sun alone isn't enough; the bleaching step is non-negotiable.
Before you reassemble your hot tub setup, make sure all components are devoid of moisture and that familiar musty smell. Once everything is bone dry and fresh, your pillows are finally ready to reclaim their rightful position. Now, relaxation awaits without any unwelcome, moldy surprises.
Sunshine and fresh air have their magic, but there's a bit more to the drying process than leaving things out to bask under the sun. Once your pillows are disinfected, the next step is to ensure they’re bone dry before reuniting them with your bubbly oasis. Placing the pillows in a well-ventilated area is key. Lay them on a clean, dry surface—maybe a weathered table on the porch or a sunlit spot on the patio that isn’t too windy. Direct sunlight can help, but be cautious; too much exposure might cause some materials to fade or become brittle.
Consider flipping the pillows periodically. This encourages even drying, ensuring that no sneaky damp patches are left behind. Patience is essential here. Rushing to return them to their rightful place before they’re thoroughly dry might undo all your hard work, inviting mold to make an unwelcome comeback. As you wait, perhaps take a moment to scrub down other parts of your spa—keeping the environment clean helps stave off spores in the future.
Once assured that your pillows are free from any lingering moisture, it’s time for reassembly. Align them carefully, snapping or screwing them back into their cozy positions. A quick sniff test to confirm that musty odors have vanished is always a good idea. Now, your hot tub is ready for a return to relaxation, mold-free and inviting as ever.
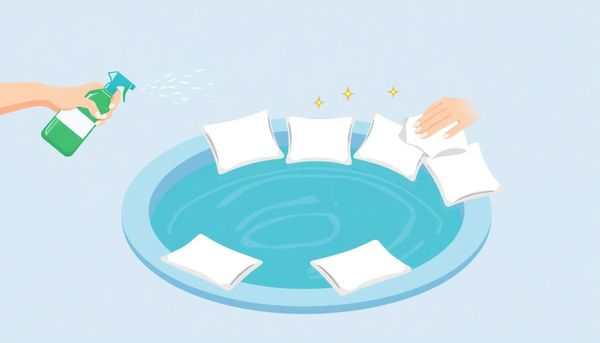
When it comes to the battle against mildew on hot tub pillows, a strategic approach is your best ally. Start by gathering your arsenal: a gentle cleaner, a soft-bristled brush, and a disinfectant. Once the tools are in hand, it's time to roll up your sleeves and get to work. Begin by removing the pillows from their cozy spots. This step ensures you can reach every hidden crevice where mildew might lurk.
Next, concoct a cleansing brew with a cleaning concentrate diluted in water—roughly 13 ounces per gallon should suffice. This is your mildew-fighting potion, designed to tackle even the most stubborn of fungal foes. Armed with your sponge or brush, gently scrub the pillow surfaces, paying attention to every seam and stitch. It's meticulous work, but it ensures no sneaky spores survive.
After the initial scrub, focus on the foam encasements, often overlooked yet crucial in maintaining a mildew-free environment. With them squeaky clean, it's time to bring in the big guns: disinfection. Equip yourself with safe attire—gloves, goggles, and long sleeves will shield you from the bleach solution. Mix a third of a cup of bleach per gallon of water, ensuring the bleach is potent and unexpired for maximum effectiveness.
Carefully wipe down all components with the bleach solution and let them bask in sunlight for thorough drying. Sunlight acts as a natural mold deterrent, reinforcing your cleaning efforts. Before reassembly, confirm that every piece is dry and mold-free. With pillows restored, your hot tub awaits, inviting you back for uninterrupted relaxation. Keep vigilance in mildew management, and your hot tub will remain a sanctuary of comfort.
No one ever really plans for mildew on a relaxing hot tub pillow, but when it shows up, it’s time to act. Before tackling the problem, it’s crucial to gather the right cleaning essentials. Start by checking your cleaning closet; many of the tools needed might already be there. A soft-bristle brush and a gentle sponge are your best allies for scrubbing without damaging the delicate pillow surfaces. They help reach into the tiny grooves where mildew loves to hide.
Next, you’ll want a reliable cleaning solution. Look for one that’s both effective against mildew and safe for use on fabric and foam. Many people find a combination of white vinegar and water works wonders; mix one part vinegar to two parts water in a spray bottle. This natural solution is tough on mildew but gentle enough for frequent use. If you’re dealing with stubborn stains, a mild dish soap, diluted appropriately, can add some extra muscle to your cleaning arsenal.
Protective gear is equally important. Rubber gloves and safety goggles can shield your skin and eyes from any harsh cleaning agents. Believe it or not, mildew spores can irritate sensitive areas, so it’s better to be safe than sorry. With these tools in hand, you’re ready to tackle that mildew and restore your hot tub pillows to their former glory. Remember, preparation is half the battle, and with the right essentials, you'll be back to soaking in no time.
Scrubbing away mildew from hot tub pillows demands more than just a quick wipe-down. Begin by removing the pillows, as per the manufacturer's guidelines—don’t skip this step or you’ll be leaving hidden mold behind. My friend once thought a simple surface clean was enough, only to be greeted by an unsightly surprise the next time they lifted the pillow.
Prepare a cleaning solution using 13 ounces of cleaning concentrate per gallon of water. Armed with a soft brush or sponge, gently but thoroughly scrub the entire surface. This might bring to mind polishing a cherished piece of silverware; attention to detail is vital. Make sure to address every seam and crevice. A small cleaning brush can be particularly handy for those tight spots. This meticulous process is your chance to banish mildew before it morphs into a recurring nightmare.
Once the pillows are spotless, the fight doesn't stop there. Disinfection is crucial. With safety gear on—goggles, gloves, the works—mix ⅓ cup of bleach with a gallon of water. The bleach concentration should be between 5% and 6%, ensuring it hasn’t expired, as its potency diminishes over time. Wipe down the pillow covers, foam encasements, and shell areas with this solution. Allow them to dry completely in the sun, leveraging nature’s own disinfectant, UV light.
Before reassembling, check everything. No sign of mold or that telltale smell? Perfect. Your pillows are ready for their next session of relaxation, minus the mustiness. Let’s keep it that way!
When it comes to banishing mildew, ensuring that your hot tub pillows are thoroughly dried is a crucial step that simply cannot be overlooked. After all the scrubbing and disinfecting, the last thing you want is to inadvertently create a breeding ground for mold by reassembling the pillows while they're still damp. Moisture is mildew’s best friend, and neglecting this step can undo all your hard work.
Consider this: a few years back, I cleaned my own hot tub pillows meticulously but failed to let them dry completely before putting them back. Just a couple of weeks later, that familiar musty smell returned, a testament to mildew's persistence. Learning from that experience, I now take extra care to let them sunbathe for a good few hours. The warmth of the sun does wonders, and ultraviolet rays provide an extra layer of protection by inhibiting mold growth.
After you’ve cleaned and disinfected the pillows, find a sunny spot in your yard and let them bask in the sunlight. Make sure to flip them occasionally to ensure even drying on all sides. If the weather isn’t cooperating, a dry, well-ventilated indoor space with a fan can also do the trick. Before reassembling, a quick smell test will confirm your success—if there's no trace of that musty odor, you’re in the clear. By taking the time to dry them thoroughly, you'll prevent mildew from making a comeback and ensure that your next soak is as relaxing as intended.
Tackling mold on hot tub pillows requires a bit of preparation, ensuring the process is as smooth and effective as possible. Begin by gathering a few essential supplies. A good all-purpose cleaner, ideally one that can navigate the grease of an engine yet is gentle enough for delicate fabrics, will be your primary weapon. Pair this with a soft brush or sponge for those broader surfaces, and a smaller brush to reach into the tightest crevices where mold loves to hide.
Once equipped, it's crucial to familiarize yourself with the manufacturer's guidelines for removing the pillows. This might seem tedious, but knowing how to detach them without damaging any components is invaluable. Have a bucket ready to mix your cleaning solution; a 1:10 ratio of cleaning concentrate to water usually works wonders.
Safety shouldn't take a backseat during this process. Mold spores can be irritating, so donning gloves is a wise step, as is wearing old clothes since things can get messy. If the mold problem is particularly severe, consider using a face mask to avoid inhaling any spores.
Lastly, plan your cleaning in a well-ventilated area. Mold removal can involve strong odors, especially if you opt for bleach in the later stages. Proper ventilation keeps the air fresh and your space comfortable as you work. With your tools and environment prepared, you're ready to tackle that mold head-on.
In the world of hot tub maintenance, a crucial step often overlooked begins with gathering the right cleaning supplies. A well-stocked arsenal is your first line of defense against those pesky mildew stains on your hot tub pillows. No one wants to lean back into their oasis only to be greeted by the unwelcome sight—or smell—of mildew.
First on your list is a non-abrasive cleaner, specifically one designed for high-moisture environments. While it might be tempting to use harsh chemicals, they can damage the material of the pillows. A gentle yet effective cleaner will do the trick, ensuring you don’t cause unintended wear and tear. Think about that all-purpose cleaner you use in your kitchen, but one that's a tad more specialized for delicate surfaces.
Next, you’ll need a soft-bristled brush or sponge. These tools will help you reach every nook and cranny without scratching the pillows. A toothbrush or small detailing brush may seem like overkill, but they’re perfect for those stubborn crevices where mildew loves to hide. A spray bottle filled with a vinegar and water solution is also handy; it's a natural way to combat mold without resorting to harsh chemicals.
Finally, don't forget your protective gear. Gloves and goggles are essential, especially when dealing with any cleaning solution. They’ll keep your hands safe from irritation and your eyes protected from splashes. With these supplies in hand, you're ready to banish mildew and bring those hot tub pillows back to their welcoming best.
When tackling the relentless foe known as mildew, safety should be your top priority. Cleaning agents, while effective, often come with their own set of hazards. It's essential to equip yourself with protective gear before diving into the task. Start by donning a sturdy pair of rubber gloves to shield your skin from harsh chemicals. A pair of safety goggles is equally vital, preventing any splashes from reaching your eyes.
Have you ever had bleach splash onto your favorite shirt, leaving it with an unsightly stain? Avoid that mishap by wearing clothes you don’t mind getting a little messy. Protective clothing, such as a long-sleeved shirt and pants, is a wise choice, especially when working with bleach solutions. Ventilation is another key aspect to keep in mind. Working in a well-ventilated area reduces the inhalation of potentially harmful fumes. If possible, clean the pillows outside or in an open space.
Additionally, ensure your cleaning tools are appropriate for the job. A soft brush or sponge works wonders without damaging the material. However, it’s crucial to remember that combining cleaning agents, such as vinegar and bleach, is a big no-no. This can create toxic fumes that pose serious health risks.
Lastly, double-check the expiration date on your bleach. Expired bleach loses its potency and could leave you with more than just a mildew problem. Prioritizing these precautions not only ensures your safety but also paves the way for a successful, mildew-free hot tub experience.
When it comes to banishing mildew from hot tub pillows, meticulous scrubbing and disinfecting are your best allies. First, ensure you have all necessary supplies at hand—gloves, goggles, a soft brush, a sponge, and a reliable cleaning solution. These tools are your frontline defense in tackling that pesky mildew.
Start by removing the pillows from the hot tub and placing them on a clean, flat surface. Create a cleaning mixture by combining water with a concentrated cleaner, one that’s gentle yet effective, much like those you might use to tackle stubborn kitchen stains. Dip your sponge into this solution and begin scrubbing the pillows gently but thoroughly. Aim for every seam and crevice, where mildew loves to hide. If your pillows have foam encasements, pay special attention to these areas since they can be a breeding ground for bacteria if not cleaned properly.
Once scrubbing is complete, it's time to disinfect. Donning your safety gear, mix a solution of bleach and water, ensuring the bleach concentration is appropriate for the task at hand. Use this solution to wipe down the pillows, allowing the bleach to sit for several minutes to ensure thorough disinfection.
Finally, dry the pillows under the sun's natural UV rays, which offer an extra layer of mold-fighting power. Before reassembling, confirm that every component is completely dry and free of any musty odors. With diligent care, your hot tub will soon be ready for relaxation, free from the unwelcome presence of mildew.
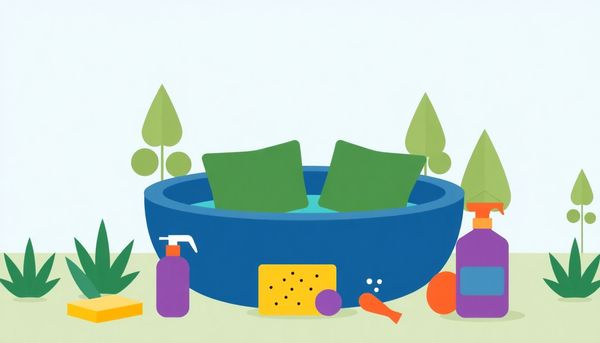
Once you've scrubbed and cleaned, the final step is critical—disinfection. This isn't just a cursory rinse; it's your best defense against returning mildew. My uncle once thought he beat mold with a quick wipe-down, only to find it resurfacing like an unwelcome guest. To ensure every trace is banished, follow a methodical approach.
First, gather your protective gear. Goggles and gloves are a must, as bleach, though a powerful ally, isn't something you want on your skin. Once suited up, you'll mix a disinfection solution—⅓ cup bleach per gallon of water. It sounds simple, but double-check your bleach concentration, aiming for that sweet spot of 5% to 6% sodium hypochlorite. Trust me, using expired bleach is like swinging a bat at a ghost: ineffective and frustrating.
With your solution ready, methodically wipe down every surface. Pay attention to the tiniest crevices where mold loves to linger. It’s not about rushing; it's about thoroughness. Picture the bleach as a detective, hunting down every last microbial suspect hiding in the shadows.
After wiping, patience becomes your ally. Pillows need ample time to dry, preferably under the sun, where UV rays assist in mold prevention. My dad always said, “Sunshine is nature's sanitizer.” It’s true, but remember, sunlight complements your cleaning—it doesn’t replace it.
Finally, before you reassemble everything, inspect closely. No visible mold, no musty smell? Mission accomplished. Now, you're not just fighting mildew; you're reclaiming your spa sanctuary.
Eliminating mold and mildew from hot tub pillows is a bit like hosting a clean-up party—except the guests are mold spores and mildew, and they’re uninvited. As you roll up your sleeves, remember, thoroughness is key to evicting these pesky squatters for good.
First, gather your cleaning arsenal: a soft brush or sponge, a small cleaning brush, and a trusty cleaning concentrate. A mix of 13 ounces per gallon of water usually does the trick. Carefully detach the pillows, following the manufacturer’s manual, and prepare to scrub away. Imagine each stroke as a swipe of a magic wand, lifting grime and mildew from every crevice.
Next, it’s time to disinfect, and bleach is your ally here. Make sure it hasn't expired—expired bleach is like a knight without a sword. Don safety gear like gloves and goggles; bleach is potent stuff. Mix ⅓ cup of bleach per gallon of water, ensuring it has the right sodium hypochlorite concentration. Swipe this solution over your pillows with precision, as though polishing a treasured artifact.
Once clean, air drying is essential. Nature’s UV rays are an added bonus, but remember, sunlight alone won't vanquish mold. Patience is vital here; ensure everything is bone-dry before reassembling.
By tackling mold promptly, you save yourself a world of trouble and keep your pillows plush and inviting. Next time you sink into your hot tub, the only thing you'll be inhaling is the soothing steam—sans the musty undertones.
There’s something undeniably satisfying about giving mildew the boot with a trusty bleach solution. So, once you've scrubbed those hot tub pillows clean, it's time to bring out the big guns. Before embarking on this disinfecting mission, don your gloves and goggles—safety first! Mix a potent solution using ⅓ cup of bleach per gallon of water, ensuring the bleach is fresh and its sodium hypochlorite concentration sits between 5% and 6%. This is not just any garden-variety bleach; it’s akin to the magic potion you use to shock your hot tub.
With your mixture ready, gently wipe down every pillow surface, carefully avoiding any areas you’ve missed. Remember, the task isn’t just about removing visible mold; it's about neutralizing every microscopic spore lurking in the shadows. Once you’ve wiped the surfaces, patience becomes your ally. Let those pillows bask in the sun, as ultraviolet rays lend a helping hand in the drying process. Mold thrives in moisture, so make sure every nook and cranny is bone-dry before reuniting them with your spa.
Check thoroughly for any residual mustiness. If clear, go ahead and reassemble your oasis. Regular upkeep will help keep mildew at bay, ensuring your hot tub remains a haven of relaxation. After all, who wants to swap tranquility for a moldy surprise?
After the exhausting battle with mildew and mold, there's one final, crucial step: ensuring complete drying. Forgetting or rushing this stage can undo all your hard work faster than you can say "fungal menace." The secret to a mold-free zone lies in being meticulous with drying the pillows. It's tempting to pop them back into the hot tub once they're merely damp, but patience is key here. Any lingering moisture is a direct invitation for mildew to resurface.
Choose a sunny, well-ventilated spot for drying. Not only does the warmth of the sun aid the process, but the ultraviolet rays are also nature's disinfectant, providing an extra layer of protection against any stubborn spores. If you're like me and live in a place where sunny days are as rare as a unicorn sighting, a fan or a dehumidifier can come to your rescue. Just make sure air circulates freely around the pillows to wick away every drop of moisture.
Occasionally, I’ve used a hairdryer in a pinch—particularly useful for targeting deep seams and folds where moisture loves to hide. But remember, moderation is key; excessive heat might damage the material. Once dry, a quick sniff test ensures no musty odors remain. This step may seem small, but it’s vital. Fully drying your hot tub pillows is the ultimate safeguard against the return of mildew, leaving you free to enjoy your spa without a second thought.
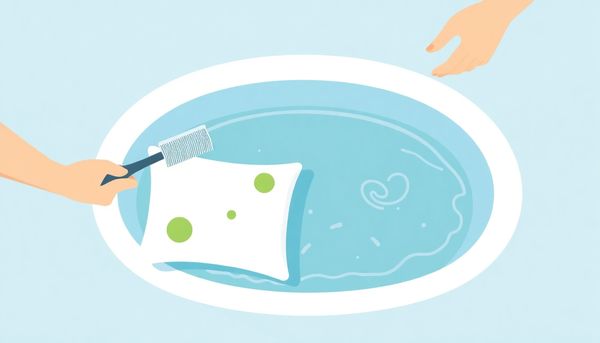
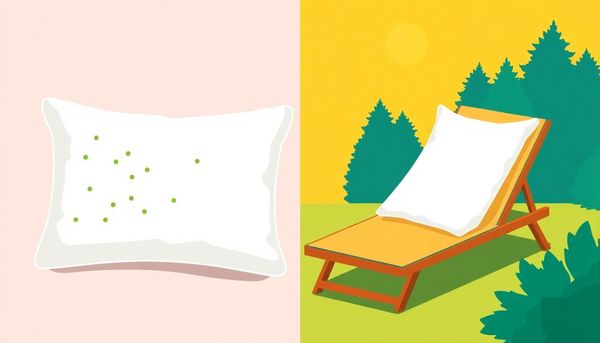
Sunshine doesn’t just brighten your day; it can also be your ally in the battle against mildew. After you've scrubbed and disinfected your hot tub pillows, giving them a sunbath can be the perfect finishing touch. The ultraviolet rays from the sun have natural disinfecting properties that can help zap any lingering mildew spores. On a clear day, find a spot where the pillows can bask in direct sunlight.
Growing up, I remember my grandmother would hang her freshly cleaned linens outside, swearing that nothing matched the freshness imparted by the sun. The same principle applies here. By placing the pillows outdoors, you’re allowing nature to provide a final, natural touch to your cleaning efforts.
It's also crucial that all parts of the pillows, including foam encasements and covers, get thoroughly dry. Moisture is mildew’s best friend, and dampness left unchecked can lead to a repeat mold invasion. Leave them out for several hours, and check periodically to ensure they’re completely dry before reassembly.
While you might be tempted to rush this step to get back to relaxing, patience pays off. By ensuring every speck of moisture is banished, you’re setting the stage for a spa experience that’s both relaxing and hygienic. So let the sun do its magic, and you’ll be rewarded with fresh, mildew-free pillows, ready to cradle your head during your next soak.
When mold sneaks its way onto your hot tub pillows, it's more than just an eyesore; it's a relentless invader that needs to be shown the door. The first step in this battle is preparation. Arm yourself with a soft brush or sponge, a small cleaning brush for those hard-to-reach areas, and a reliable cleaning solution. These are likely already tucked away in your cleaning arsenal, waiting for their moment to shine.
Gently remove the pillows from the hot tub, as per the manufacturer's guidance. Immerse your brush or sponge in a solution made by diluting 13 ounces of cleaning concentrate per gallon of water. This concoction is potent enough to tackle the damp-loving mold yet gentle on your pillow material. As you scrub, focus on every seam and corner, where mold tends to hide. Take your time—rushing might leave behind spores that could spark a mold renaissance.
Once the visible mold is gone, it's time to bring in the big guns: disinfection. Suit up with gloves and goggles, and mix ⅓ cup of bleach per gallon of water. Wipe down every surface of the pillows with this bleach solution, ensuring you've reached every nook. Let the pillows bask in the sun, not just drying, but allowing ultraviolet light to lend a helping hand in eradicating any stubborn spores.
Before reuniting the pillows with their hot tub home, make sure they’re bone dry and mold-free. Each step of this meticulous process ensures you’re not just cleaning the surface, but preventing future mold invasions. With a little effort, you can reclaim your pillow's pristine state, preserving both your comfort and peace of mind.
This article provided insights into maintaining your pool. Start your pool care journey today!
Want to become a pool maintenance expert? Our free Pool School course covers everything you need to know about pool care. From basic maintenance to advanced troubleshooting, you'll learn how to:
Join over 10,000 pool owners who have already transformed their pool care routine. Get started with our free Pool School course today!